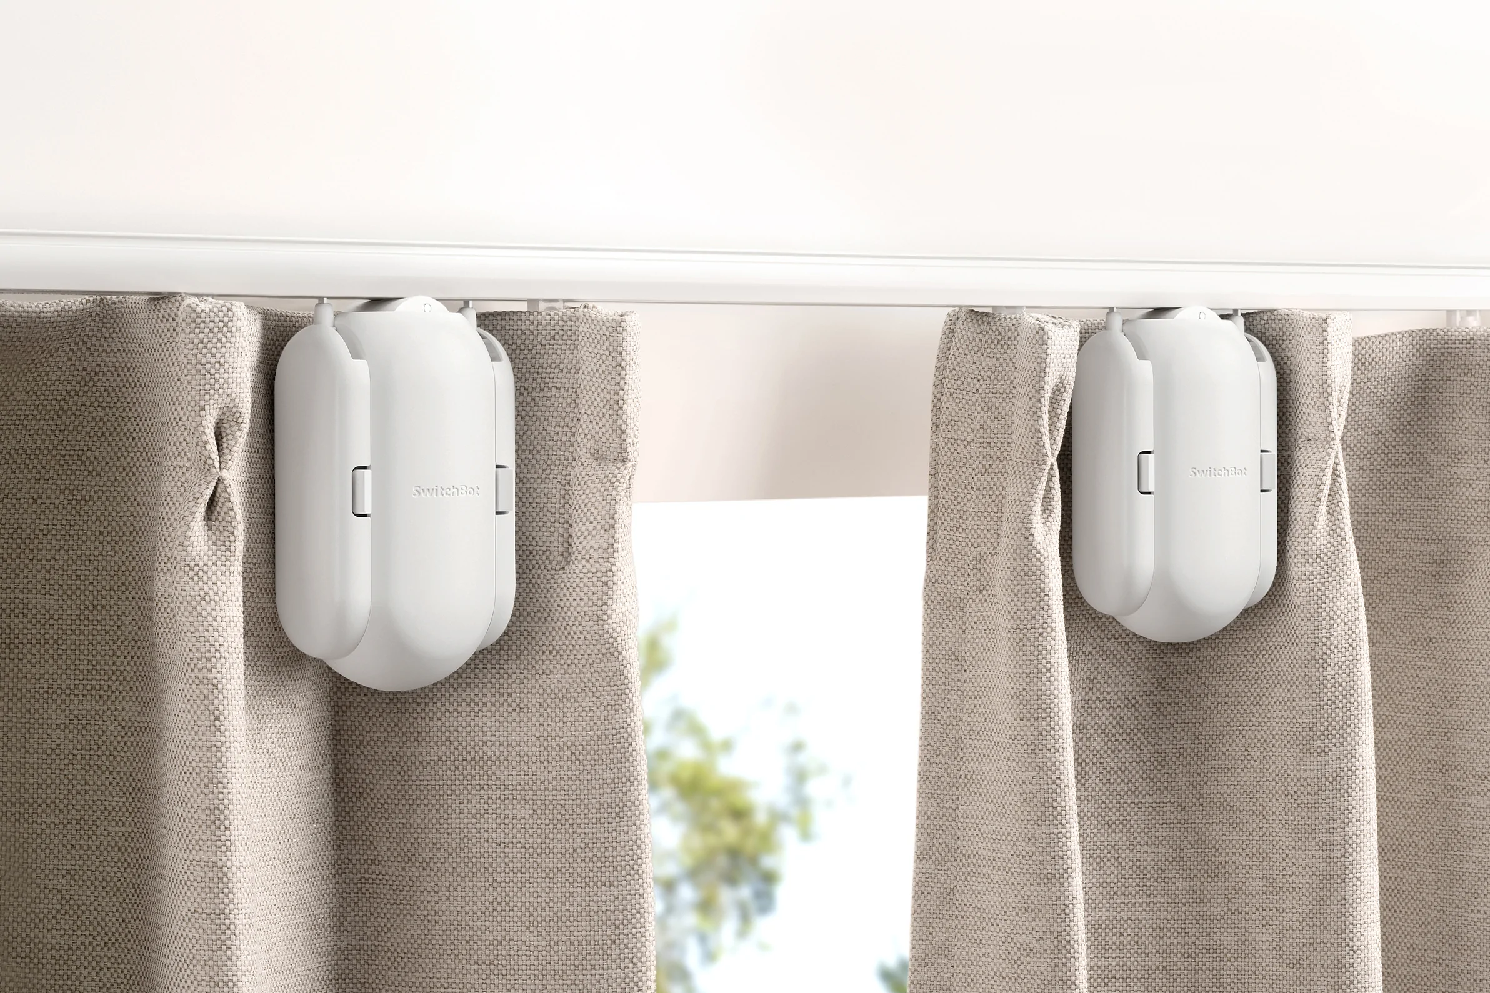
Even though our homes are equally smart, most of us still have to get up to close (or open) our blinds because motorized tracks are expensive and difficult to install that turn stupid curtains on your Smartphone in a matter of minutes. Easy to install, switchbot curtains are compatible with most types of curtain tracks and can also be powered by solar panels. Therefore, recharging is not required. It’s big and expensive, but the curtain switchbot is still a neat upgrade.
What is SwitchBot?
The SwitchBot realm started out as a smart button presser: a little robot with a lever that comes out to push buttons for you. It allows you to create one-button smart devices, such as coffee machines. At that time, I took the opportunity to review one device because it sounded like laziness and storing stupid equipment.
But as my journey to a smart home continues, passing the peak of inflated expectations descending into the trough of despair, and returning to the highest point of satisfaction, I have come to realize that old, silly-looking products are an essential part of the ultimate smart home. It’s not about getting gadgets with flashy smart Wi-Fi because half the time, they won’t work together with different standards.
It’s about automating common daily tasks to save your time and effort. The curtain switchbot ecosystem is a great solution for these.
Types of curtains: choose wisely
SwitchBot has really taken into account all types of blinds and has four or five different SKUs to suit most blind types:
- rod and rod 2 (both diameter 15-40 mm)
- U-rail; Both the European Union and the United States
- I-rails
The switchbot curtain rod 2 is the latest model designed for curtains that run along the rail by improving the handling of the extendable railing. But they have exactly the same behavior. Making sure you select the right type and that your specific system is compatible is an important step. Therefore, carefully check the product page.
Bluetooth control and settings
No matter what style of switchbot Curtain you have, after downloading the SwitchBot app and creating an account. Adding devices is surprisingly easy. Everything works with Bluetooth, so connecting to an ad-hoc network is unnecessary. Or try to remember your own Wi-Fi details to forward and then wait for them to join. It was there right away. It automatically selects new devices detected and proceeds with the configuration.
Out of the box, switchbot curtains are Bluetooth-only. This means that your phone must be within range to control it. That said, due to low data requirements, I found the range more impressive than Bluetooth audio devices, which typically cut out about ten meters behind a wall. I can easily control it from the room above, next to it, or directly from the corridor. I have also found that they come to life in the app much faster than most IoT devices, taking at least a few seconds to ping back and gaining access.
Check out: Get 15% off on purchases of 2 or more products. Use code: 15HMTD
Use of batteries and solar panels
After turning it on and off twice a day for a few weeks, the switchbot veil dropped to about 85%, which lasted about 3-6 months before it needed to be charged (via USB-C). Of course, we had enough device in our life without needing to charge curtain bots too. This is why SwitchBot also sells extra solar panels. This attaches directly to the back of your SwitchBot’s curtain to keep it full.
If the position is not suitable, since your curtain rod is too high, don’t worry. The switchbot curtain smart electric motor also includes adhesive Velcro strips and a 50cm USB-C cable hidden behind the solar panel. It’s a really elegant and efficient design.
You need a fairly bright level of sunlight for these tiny panels to work. If your windows are shaded most of the day or are overlooked by your neighbor’s house, it might not work for you. If your curtains are fully retracted to the side of the window, the curtain will not see the sun at all, and it shows that the curtains are not working either. Since we will close the curtains in the summer, Make sure the switchbot curtain charging is sufficiently charged to last through the winter.
SwitchBot Hub Mini and IR Device
If you want to add cloud control, Third-party automation, and voice assistant integration, you will need a SwitchBot Hub Mini. The Hub Mini acts as a replacement Bluetooth controller for any device. It Allows you to remote control it from anywhere in the world or make your device accessible to Google Home and Alexa, as well as automation services like IFTTT. It also lets you create scenes. The switchbot curtain rod 2 working set; while Apple’s HomeKit isn’t directly supported, you can export scenes to Siri Shortcuts.
The switchbot Hub Mini also has a secondary function: it can act as an infrared blaster to control your other non-smart devices, such as TVs or air conditioners. The process of learning the device is simple enough, and if the device is in the database, all buttons are available. If not, you can still teach each button individually. But you may want to skip the hassle and learn the buttons really needed to run automatically.
Once you have added an IR remote to your Hub Mini, it will appear as a device on your home screen. You can also add actions for that device to any scene you create. For example, I created a movie night scene that includes the following:
- Close the movie curtain with switchbot curtains.
- You can turn on the amplifier and projector from the Hub Mini.
This is a routine I do at least once a week, walking around the switches in the movie room while we are all waiting for everything to turn on. Take at least a few minutes! Now I can do that from the kitchen with a simple Siri command on my watch, and the room is ready when we arrive. That might seem a bit automated, but it will save me a few hours a year.
Manual Control and Assist Mode

You may be wondering if you can still pull your blinds closed or open after installing the switchbot curtains blinds, and the good news is you can if you have Assist Mode enabled in your settings. As the name suggests, it is even better. Just gently pull on one side, and SwitchBots Curtains will take over and do the work for you.
Remote control
If you don’t want to be woken up by the buzzing noise of automatic curtains in the morning and want to control it when you wake up, another accessory you might consider is the aptly named SwitchBot Remote. It Works with all switchbot products, not just curtains. It has two buttons, and each button can be assigned to a single action. This may be the weakest offering in the SwitchBot realm when compared to similar smart home button products. Meanwhile, the switchbot curtain opener Remote has two buttons, but each button can only have one.
Check out: Get 15% off on purchases of 2 or more products. Use code: 15HMTD
Is it worth it?
Curtains usually come in pairs. This means that for a single window, you will need two switchbot curtain for $160 if you don’t want to recharge. You may also want to add a few solar panels ($40 more) and a Hub Mini to allow remote and cloud-based control. On “smart,” that’s a fair change for everyone. You can drastically reduce that amount if you buy in bulk. Modify your curtains for a one-off look and only requires a basic schedule.
Switchbot curtain Features
- The remote control is a necessary addition.
- You can use Alexa and Google Assistant
- Scenes let you automate your curtains.
The switchbot curtain opener communicates via Bluetooth, so initial configuration is done via your phone across a range of devices. Pairing SwitchBot curtains is quick, and if you already have a pair, you can tell the home assistant switchbot curtain they closed a window.
When paired, there will be a quick calibration process. You use the controls to position them on and off. After that, you can remotely control your device while you are within Bluetooth range. In the end, walking into the room, pulling out the phone, opening an app, and then closing or opening the blinds is more difficult and time-consuming than manually walking over and opening/closing them.
To make it easier, there are a few options for you. Firstly, there is a switchbot curtain remote, which can be paired with the automatic curtain opener switchbot to give you a remote control. You just attach the battery-operated remote where it’s most convenient. Then program one button to open the curtain and one button to close it.
Various control options
When the calibration is complete, you can mount the switchbot Curtain on a curtain rod, and it’s as simple as attaching it, the robot is now ready for you to work on. The same applies to many smart home devices. You can choose between different control options. On the one hand, the diy switchbot curtain can be controlled via an app using a wireless Bluetooth connection. You can then make various adjustments within the app, especially creating schedules or areas that should be covered with curtains are adjusted here.
But the Bluetooth connection also has flaws, so I have to consider that this is limited to 10 meters, so controlling the device further away from the room in question is not a concern. An alternative control is a practical remote control that you can get for just 15 euros due to its small size and the lack of wires. So you can install it anywhere. Installation is just as easy as a switchbot curtain rod once you connect it to the Smartphone app. You can customize the switches and what each key means.
Battery life
Instead of a wired system, SwitchBot Curtain is a wireless solution. It uses a rechargeable battery that lasts eight months, depending on its use. This means you only need to charge the switchbot curtain battery once or twice a year. This section will help you to know how to charge switchbot curtain.
Moreover, you can even forget about having to charge your batteries by installing a solar power strip accessory. Sunlight will ensure that the switchbot curtain battery life is on a daily basis. By default, the switchbot Curtain has a built-in battery that charges via USB-C, according to the company. After that, you can remove the motor and charge it again. If you don’t want to do this, you can buy extra solar panels ($25).
How to install switchbot curtains:
- First you can tap the + icon at the top right of the home page.
- You can tap the curtain icon to enter the add curtain page. Then press and hold the reset button on the curtain until the LED starts flashing.
- Now tap next on the Add switchbot curtain rod page.
- You can rename your curtain and tap next.
- Finally tap the rod. Tap any card that fits your curtain style on the Select, Your Style page. Then select Video Guide or Image Guide to continue. Installation videos of switchbot curtain are also available on YouTube.
Bottom line:
SwitchBot has put a lot of thought into tackling a bunch of stupid products around the house, and I can’t wait to see what they come up with next. The original switchbot push button for $30 is great value for money, and it fills a gap in the smart home ecosystem that isn’t absolutely necessary. Plus, the Hub Mini is great value, and it’s not only a nice upgrade for adding cloud-based control to your switchbot curtain smart electric motor device. It also makes for a very effective fast, dirty infrared controller and Support IFTTT automation.
For me, the most powerful aspect of the switchbot curtain review is that it combines all the parts of a normal routine, like closing the curtains and turning on the projector and the AV receiver. All things are done using Siri Shortcuts. That’s the smart home magic that excites me and never happened before.